
Master Chatstat:
Your Easy-to-Follow How-To Guide
Welcome to Chatstat
Chatstat is the ultimate social media monitoring tool designed to protect your loved ones from potential online dangers. This easy-to-follow how-to guide will walk you through each step of using Chatstat, ensuring you make the most of its powerful features. You can be proactive in safeguarding your loved ones from cyberbullying, mental health issues, and self-harm.
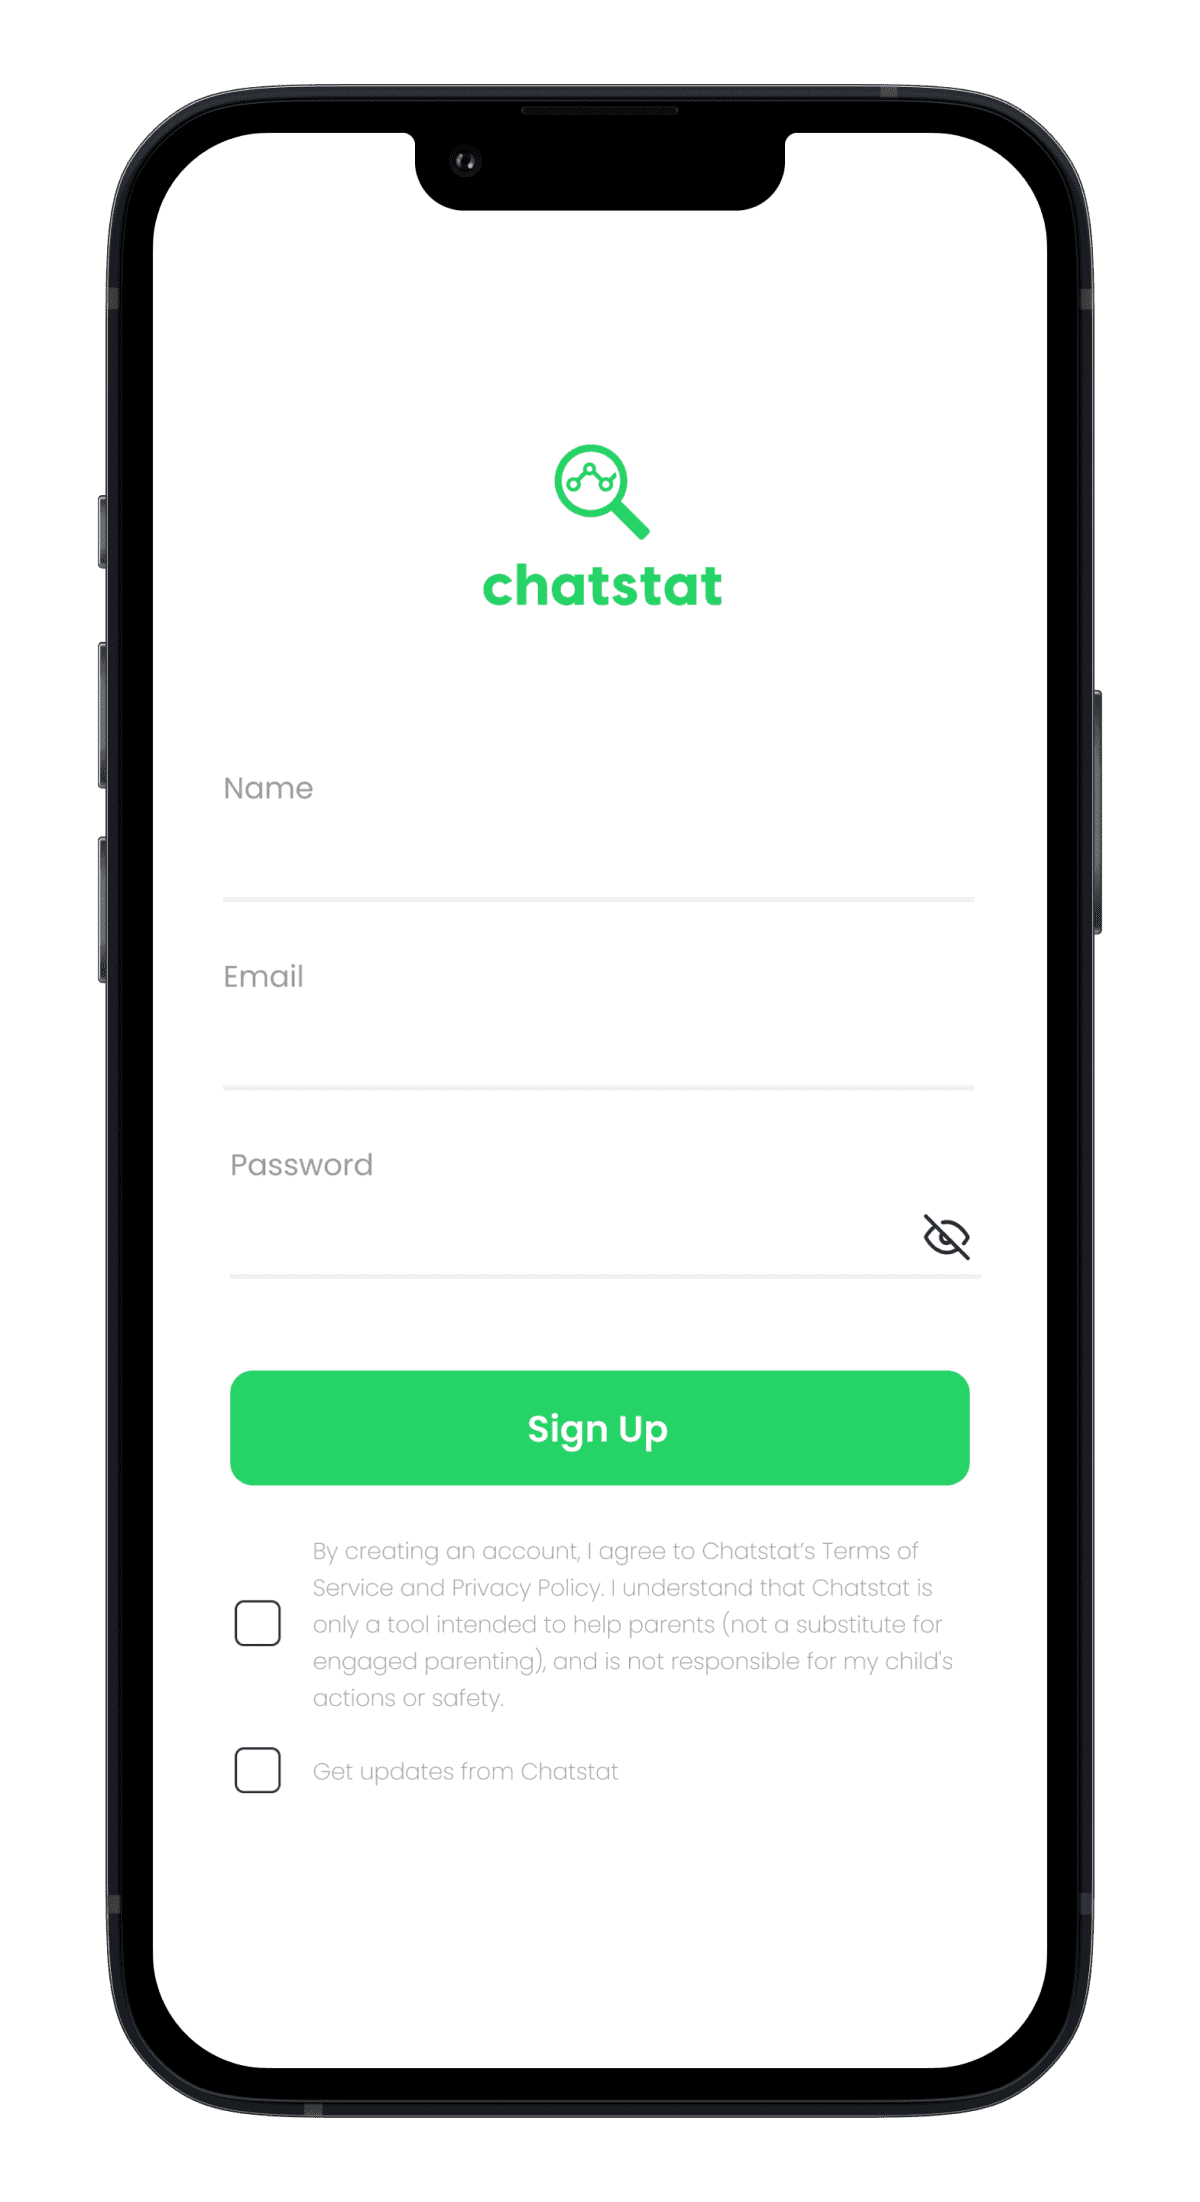
Step 1: Log in to Your Chatstat Account
To begin, log in to your Chatstat account using your username and password. If you don’t have an account yet, sign up to start your free trial.
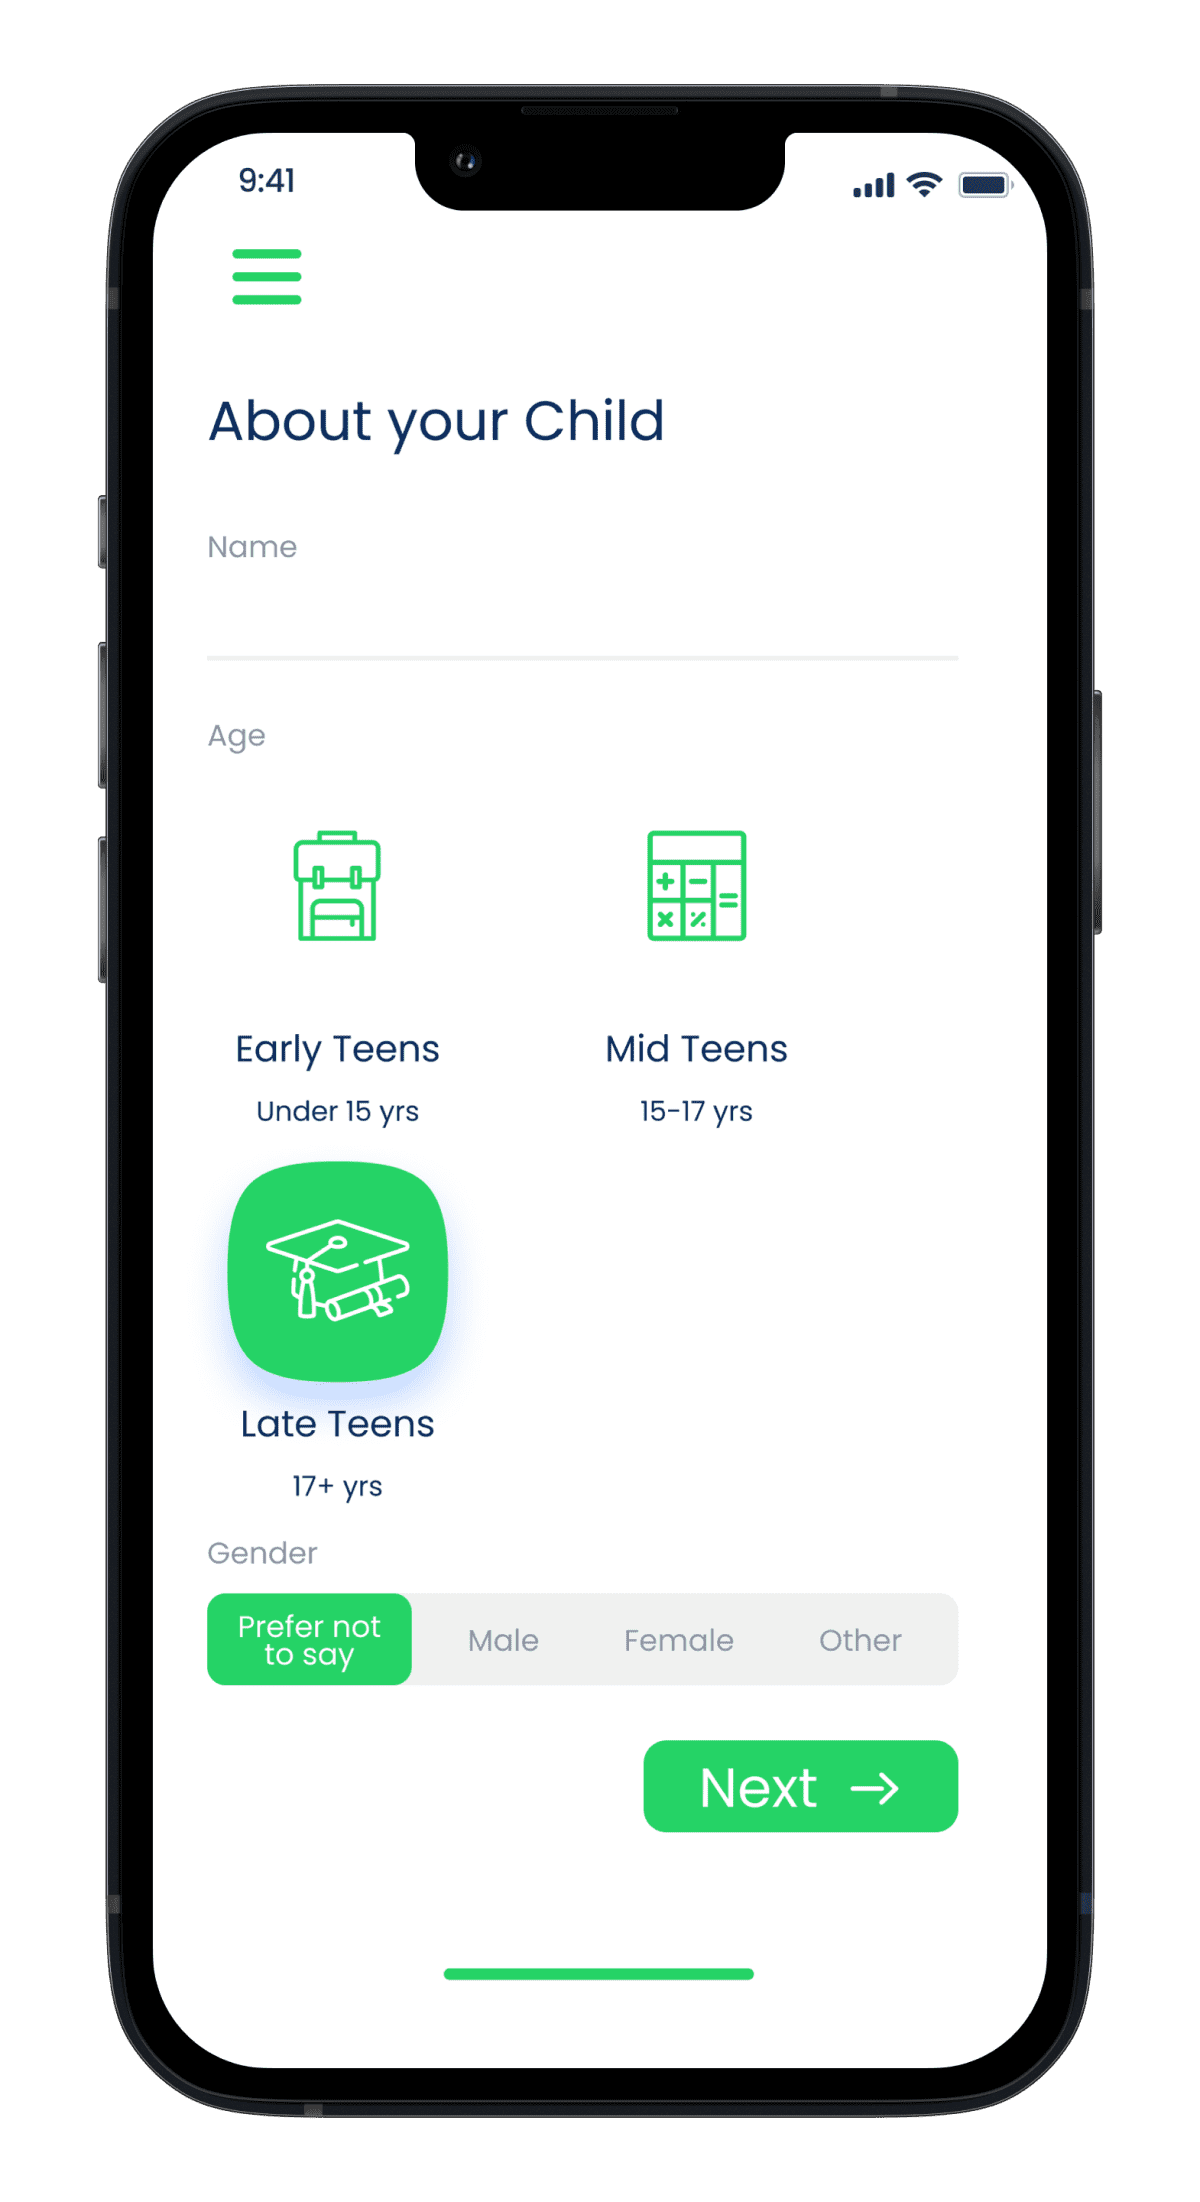
Step 2: Create a Personalized Monitoring Experience
Once logged in, enter the client’s name or ID, their age, and gender. This information will help create a personalized monitoring experience tailored to their needs.
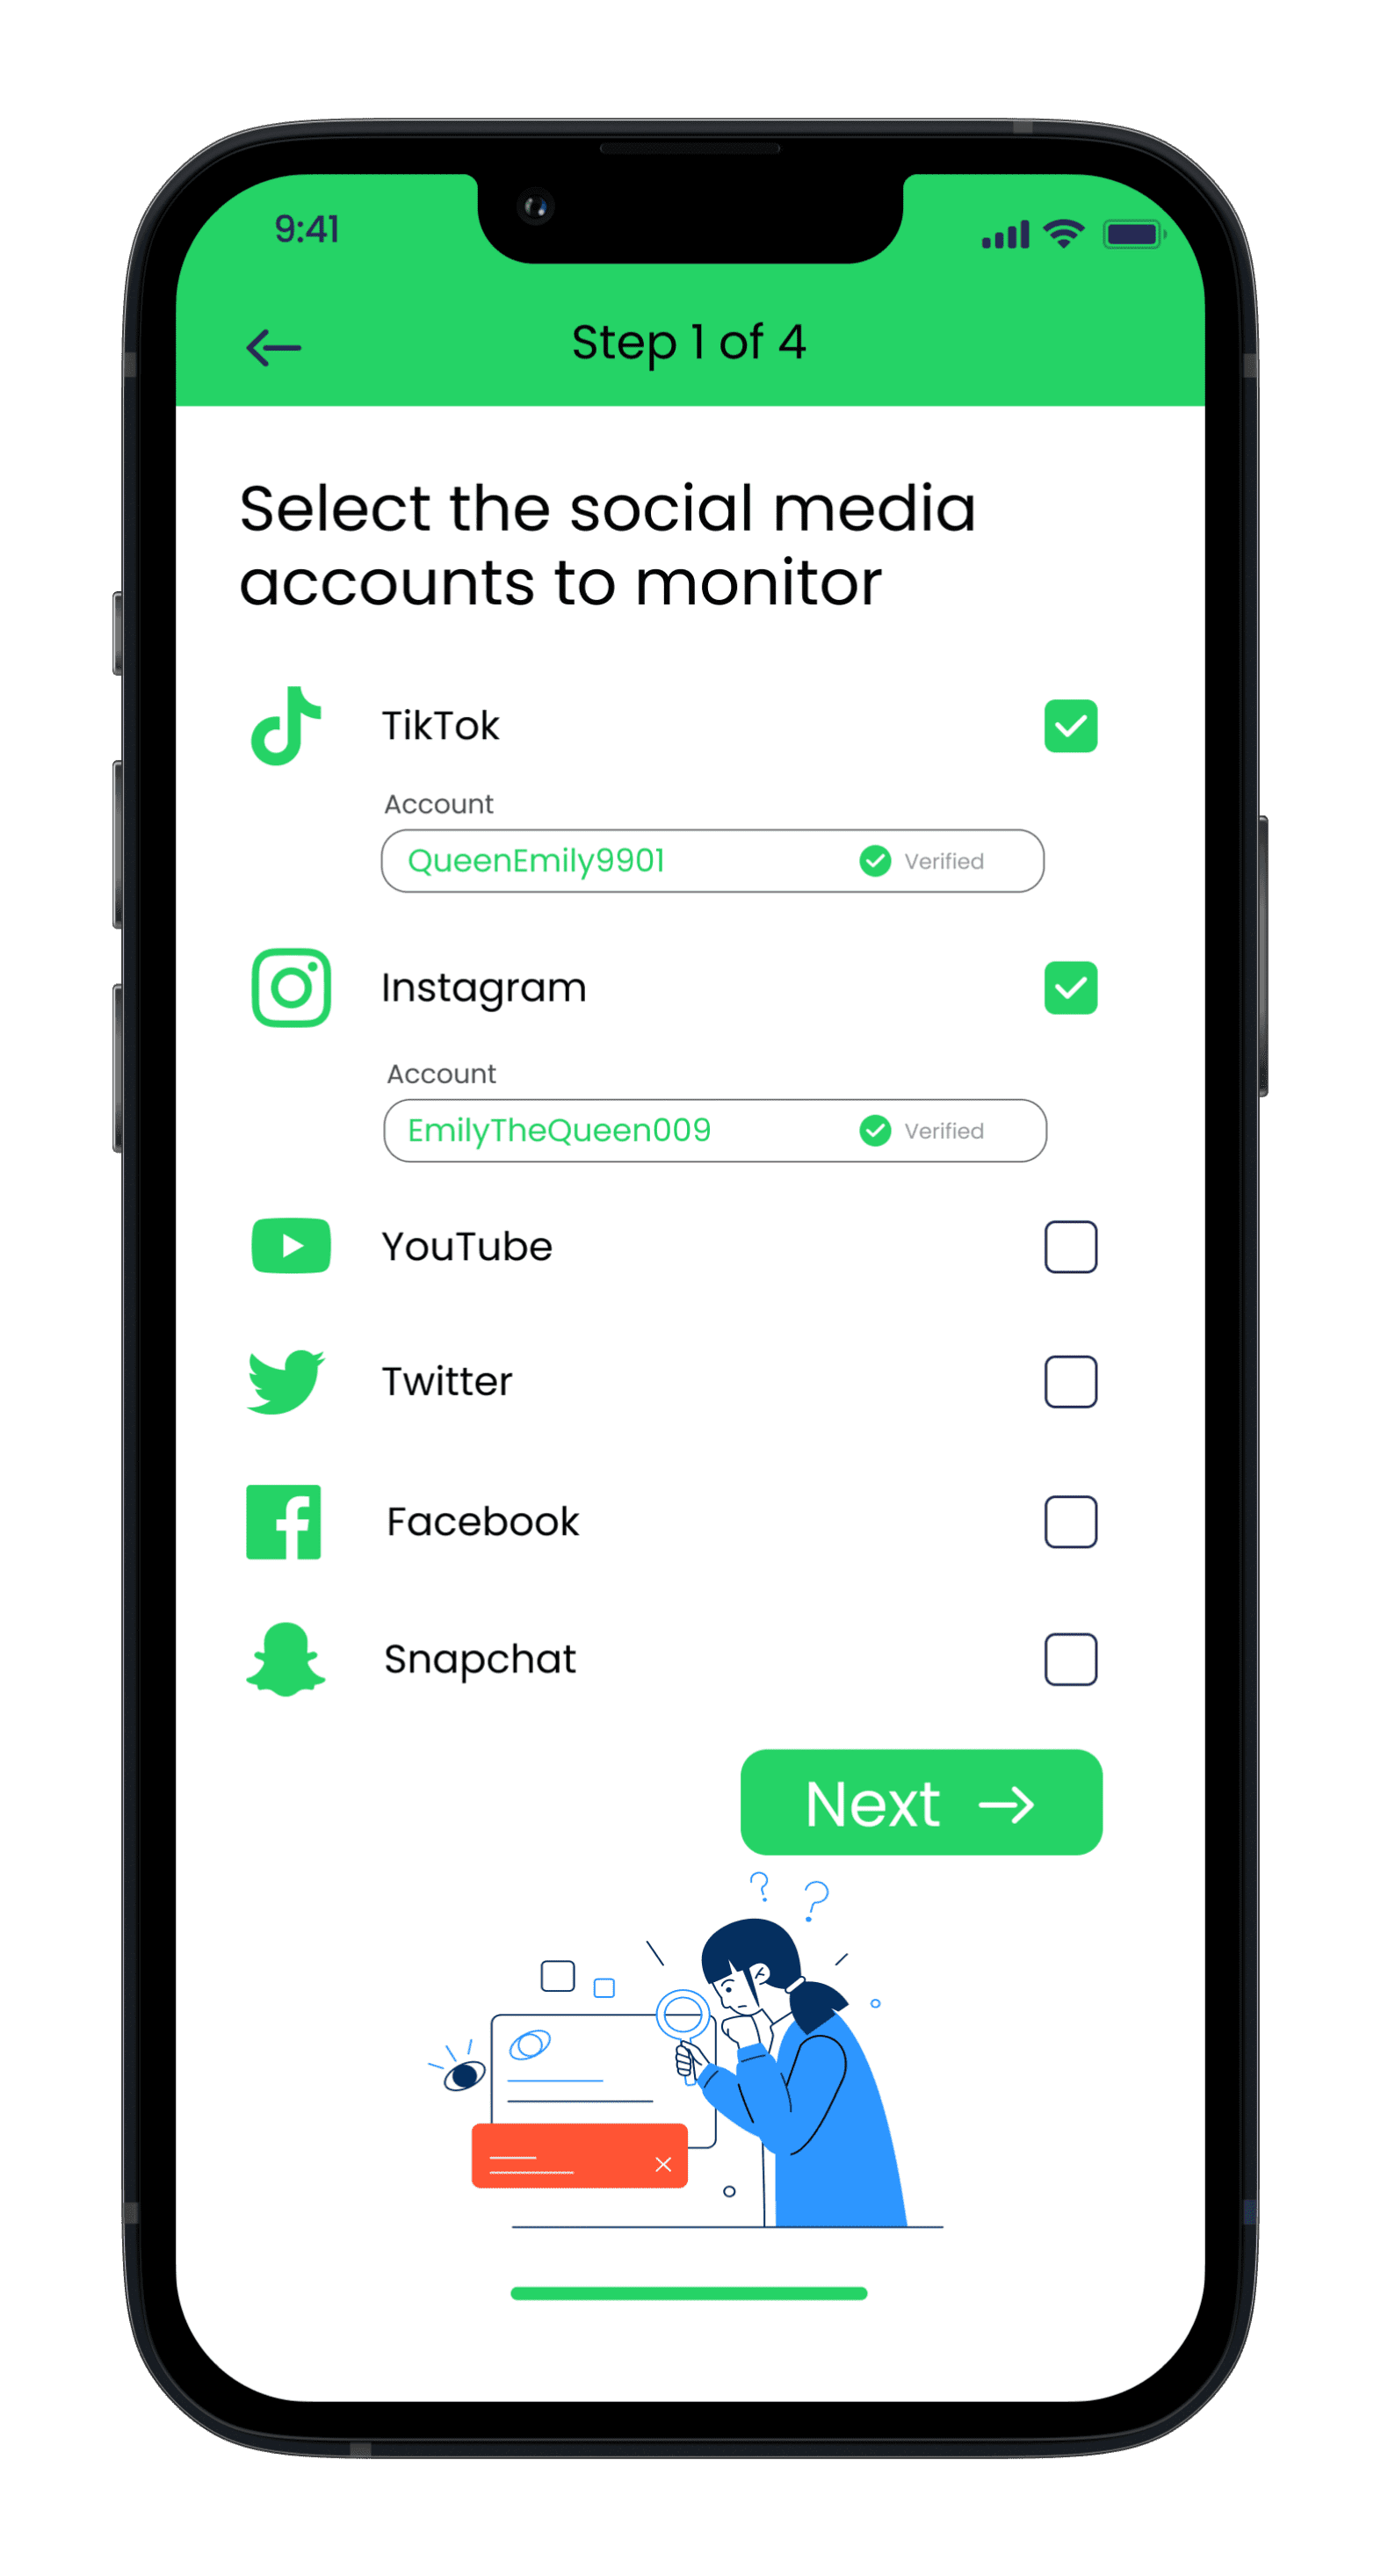
Step 3: Add Social Media Accounts to Monitor
Next, input the username of the social media account you’d like to monitor. Chatstat supports a wide range of popular platforms, including Facebook, Instagram, Twitter, and more.

Step 4: Set Alert Sensitivity
Choose how sensitive the alerts should be when detecting potential concerns. This means deciding how often you want to be notified about possible issues – whether you prefer to be alerted only for more serious concerns or even for milder ones.
Step 5: Customize Alerts with Risk Words or Phrases
Tailor the alerts by adding specific risk words or phrases unique to the individual, such as a former partner’s name or a particular topic that may cause distress. This will further refine the monitoring process.
Step 6: Initiate Monitoring
Click “Done” to initiate the monitoring process. Chatstat’s advanced AI will begin scanning publicly posted content for potential risks.
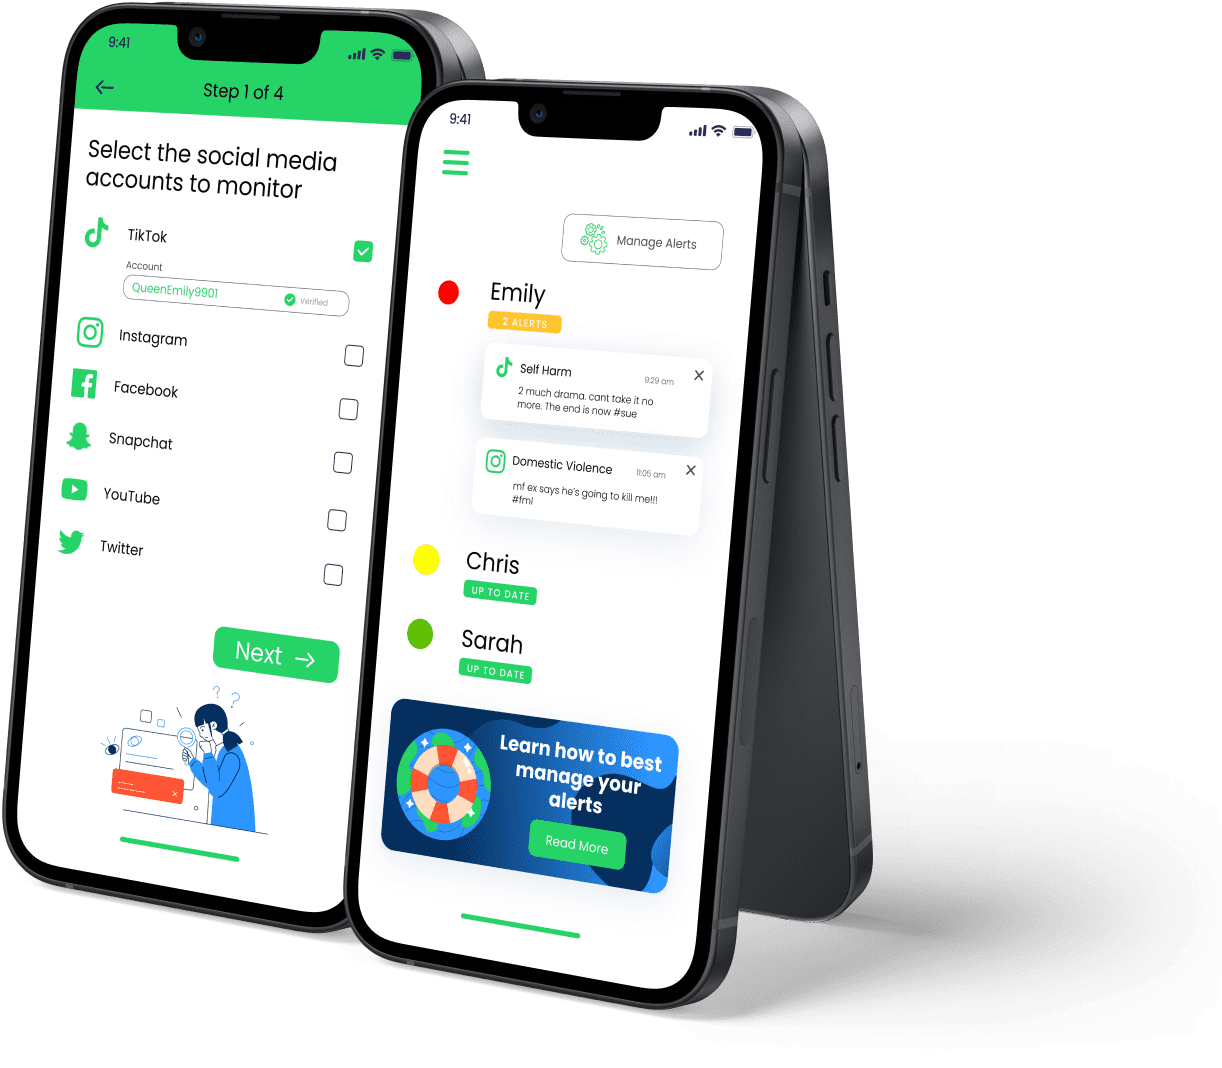
Step 7: Receive and Review Alerts
When an alert is triggered, you’ll receive a notification. Log in to your Chatstat account to review the details, including the alert’s content and risk level.

Step 8: Take Appropriate Early Intervention Actions
Use the information provided in the alert to take appropriate early intervention and de-escalation actions, ensuring safety and support for the individual.
Step 9: Monitor Your Dashboard
View your dashboard regularly to better understand the type of alerts you’re receiving and identify those most at-risk. This will help you make informed decisions about the necessary support and intervention.
How To Set Up Chatstat on your Desktop
Step 1: Log in to Your Chatstat Account
To begin, log in to your Chatstat account using your username and password. If you don’t have an account yet, sign up to start your free trial.
Step 2: Create a Personalized Monitoring Experience
Once logged in, enter the client’s name or ID, their age, and gender. This information will help create a personalized monitoring experience tailored to their needs.
Step 3: Add Social Media Accounts to Monitor
Next, input the username of the social media account you’d like to monitor. Chatstat supports a wide range of popular platforms, including Facebook, Instagram, Twitter, and more.
Step 4: Set Alert Sensitivity
Choose how sensitive the alerts should be when detecting potential concerns. This means deciding how often you want to be notified about possible issues – whether you prefer to be alerted only for more serious concerns or even for milder ones.
Step 5: Customize Alerts with Risk Words or Phrases
Tailor the alerts by adding specific risk words or phrases unique to the individual, such as a former partner’s name or a particular topic that may cause distress. This will further refine the monitoring process.
Step 6: Initiate Monitoring
Click “Done” to initiate the monitoring process. Chatstat’s advanced AI will begin scanning publicly posted content for potential risks.
Step 7: Receive and Review Alerts
When an alert is triggered, you’ll receive a notification. Log in to your Chatstat account to review the details, including the alert’s content and risk level.
Step 8: Take Appropriate Early Intervention Actions
Use the information provided in the alert to take appropriate early intervention and de-escalation actions, ensuring safety and support for the individual.
Step 9: Monitor Your Dashboard
View your dashboard regularly to better understand the type of alerts you’re receiving and identify those most at-risk. This will help you make informed decisions about the necessary support and intervention.